
WordPress Guide to Use CDN
All website owners want to make their sites super fast. It helps them to find a better ranking in the SERPs of different search engines, attract a large number of visitors and keep them engaged on their sites.
As Google gives great importance to website loading speed while displaying them in search results, a slow loading website may have high bounce rate. In that case, the site owner may lose his business little by little.
Using a CDN can help you to make your website fast. In this article, we will talk about how you can add a CDN to your WordPress site and increase its performance. So, gear up & commence the voyage.
What is a CDN?
A CDN is the abbreviation of Content Delivery Network. Actually, it’s a combination of multiple servers scattered in different geographical locations of the World. When visitors try to access your website, the CDN diverts their requests to the nearest servers. It allows them to visit your website quickly and take the desired action easily (such as downloading website materials, signing up for a newsletters, sale, etc,).
Let’s understand it with an example- Suppose your website is hosted in the UK. If a visitor tries to access it from Australia, it will take some time to display the result for the requested term in case you don’t use a CDN. If you use a CDN, it transfers the user’s request to the local server (Australian) of the website and helps him/her to browse your site easily.
Main advantages of using a CDN
- It diminishes the total number of HTTP requests to the main server of your website.
- Improves the overall experience of visitors when they browse your site.
- Make your website super fast and helps it to float up in the SERP of Google, allowing you to get lots of organic traffic.
- Helps you to save your valuable resources and cuts the website operation & maintenance cost up to a certain extent.
- Can handle a tremendous increase in website traffic.
How to use a CDN on your WordPress Website?
Adding a CDN to your WordPress website is a painless process if you use WordPress plugins. When you purchase a CDN for your WordPress website, there are some easy steps that you need to follow to accomplish the WordPress CDN integration in an easy way. See below how you can do that-
1. Choose a reliable CDN service
There are different types of CDN available in the market such as peer to peer CDN, origin pull CDN, and Pop pull CDN. You can choose anyone of them depending on your needs and budget. But, don’t make needless haste. Take your time and analyze different CDN providers from different parameters such as the availability of bandwidth, price, network quality, 100% availability, coverage area, the technology used for data transfer, 24*7/365 days support, the monitoring facility, etc.
All these help you to choose an excellent CDN for your website. Always keep in mind that each CDN is a little bit different from others when it comes to WordPress CDN integration. So, you should be cautious about it and consult a WordPress developer to determine which CDN fits your WordPress site perfectly (in case you are a new WordPress user and don’t understand these complex technicalities).
2. Take your website backup
It’s not a fixed rule, but before making a colossal change on your site, you should take the backup your important database and files. The manual process of taking website backup may be a time-consuming task. So, you can finish this action easily by using a WordPress plugin.
3. Download the Plugin or use the recommend one
When you buy a CDN, the CDN provider recommends you to use specific WordPress plugins to add the CDN to your site. In case, they don’t recommend, you can pick a suitable plugin yourself from the WordPress plugin directory or third party sellers. For your convenience, the names of some plugins are listed-
4. Adjust plugin settings
When you download and install the plugin on your website, you should go to the dashboard of your website>performance> settings> choose the CDN provider and enable it.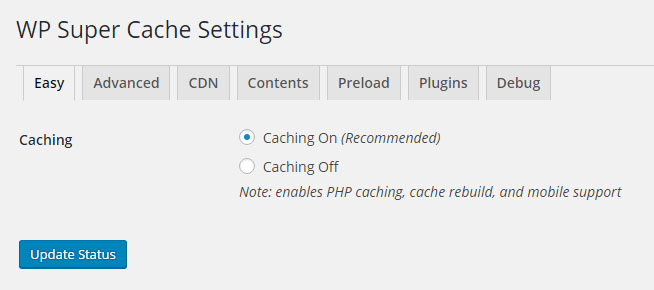 Here, you need to make changes in plugin settings depending on your requirements.
5. Configuration
When you complete the above step, you need to come to the configuration section. Here, you need to fill up the details that you have received from your CDN provider. When you complete this step, you should replace the host site name with the host name supplied by the CDN service provider.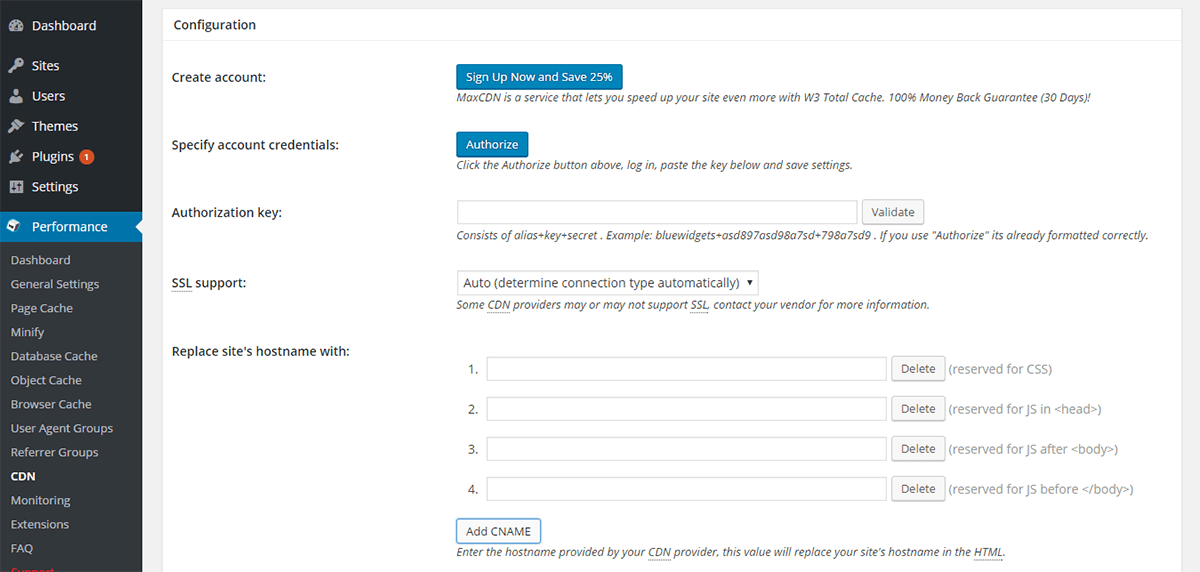 You can also reverse this change and upload the files on your site from your original server.
6. Pull Zone
On a number of occasions, you have to create a pull zone before getting a CDN URL to adjust the settings of the plugin you are using to add the CDN to your WordPress site. This pull zone is supposed to be set up in the CDN server.
To do so, sign into your CDN account, navigate to the control panel, set up a pull zone and give a name to it. In case you want to use a custom domain, then you will have to create CNAME record. As soon as you accomplish this step, you should check the setup and save the changes you have made.
7. Use FTP to upload files
Many times, website admins choose a CDN which doesn’t support WordPress plugins. Don’t get frustrated if you face the same scenario. Most of the CDNs support file uploading through FTP. So, when you choose this option, you need to collect some useful credentials(such as the FTP settings offered by your CDN service provider, security protocol, FTP host, login details, etc,) as soon as possible and keep them in ready mode to use.
8. Manual Uploading
If you don’t want to use plugins to add a CDN to your site, then you can do it manually. But, you should use this method only when you are a hardcore WordPress user and are familiar with complex technical terms and procedures. Don’t try this method if you are a new WordPress user.
Process:
- First of all, you need to upload all important files (uploads folders, static content, etc,) to the CDN you choose.
- Now configure WordPress and search those files in the CDN.
- Configure your Cpanel and add a CNAME record to your DNS.
- Change all uploads in sub uploads folder to a sub-domain and cookie domain as well.
- Save all the changes you have made.
Note- Define domain parameter in case you are using Google analytics on your website.
Takeaway idea
Using a CDN makes your website fast and benefits you in many ways. Follow the above-mentioned tricks to add a CDN to your WordPress site in an easy and effortless way. In case you come across unexpected scenarios and errors that are beyond your understanding, do contact an expert WordPress developer.


About Author
Nicole
I am the admin at 10TechDesign. I am also a technical blogger and digital marketing expert. I handle all internet marketing-related activities at 10techDesign along with his team.