
First Flutter Tutorial for Beginners – A Comprehensive Guide
Are you a beginner in Flutter and want to make your first Flutter application? If your answer is yes, then this Flutter Tutorial for Beginners blog is for you. In this blog, readers will get a complete guide to developing a basic Flutter application. Here, we will discuss everything, right from the basics to the advanced concepts. We will also learn about the tools that are needed for Flutter app development and the different steps that go into making a Flutter app. So, let’s get started and explore the world of Flutter.
- Introduction – Flutter Tutorial for Beginners
Flutter is a mobile app SDK (Software Development Kit) created by Google. It is used to make apps for Android, iOS, Windows, Mac, Linux, Google Fuchsia, and the web from a single codebase.
Flutter is an open-source mobile app development framework that uses the Dart programming language. Flutter provides a rich set of Material Design and Cupertino (iOS-style) widgets, as well as APIs for animation, graphics, gestures, and various other tools that are required to design an interactive cross-platform app. Apart from this, Flutter offers a rich library of plugins for integration with other SDKs, such as Firebase, Facebook, and more.
Flutter Tutorial for Beginners – Start Your First Flutter App
So, let’s get started with this Flutter Tutorial for Beginners and see what we will learn in this blog:
- Setting up the Flutter environment
- We will learn the basics of how Flutter works
- We will create layouts in Flutter
- How to keep Flutter code organized
- How to make our app responsive for different screens.
- Making your app’s appearance and feel consistent
Set up your Flutter environment
Step 1: Install the Flutter SDK
To set up the Flutter environment, first, we have to install the Flutter SDK and then download and install an editor such as Android Studio or Visual Studio Code. Flutter developers can go to the Flutter documentation page at any time to see the latest instructions on how to install the Flutter SDK. On this page, you will get complete information on SDK installation, development target-related tools, and the editor plugins.
Step 2: Download and install an editor such as Android Studio or Visual Studio Code.
Here we are using Visual Studio Code (VS Code) to set up the Flutter environment. It is a free tool that runs on all major platforms.
Instead of Visual Studio Code (VS Code), you can also use editors like Android Studio, Emacs, Vim, IntelliJ IDEs, or Notepad++. They all work with Flutter.
However, since the instructions automatically use VS Code-specific shortcuts, we advise you to use it here. It’s much simpler to instruct the reader to “click here” or “press this key” than to explain that they should “do the appropriate action in your editor to do X.”
Step 3: Choosing a development target
Flutter is a multi-platform toolkit, and you can easily use a single codebase to create applications for all the available operating systems, like iOS, Android, Windows, macOS, Linux, and Web.
However, we will still suggest you choose a single operating system initially. Your application will run on this platform during development, and this will be your ‘development target’
This simple example demonstrates the significance of selecting a development target. Let’s suppose you are using a Windows laptop to develop your Flutter app, but you have chosen Android as your development target. Then, you’ll need to use a USB cable to connect an Android device to your Windows laptop, and your app-in-development will run on that Android device.
Instead of adding something else to your laptop, you can make the process easier by choosing Windows as the development target. In this scenario, your app-in-development will run on the Windows app alongside your editor.
Now is the time to make your choice. Keep in mind that you will always have the option to run your app on other operating systems in the future. Having an end goal in mind for your development makes the transition to the next stage much easier.
Now, you are done with the setup part, and you have installed the following things on your device:
- Flutter SDK
- Downloading and installing Visual Studio Code with the Flutter plugin.
- Choosing a development target. (We can use Visual Studio for the Windows operating system and Xcode for the Mac operating system)
- Create a project
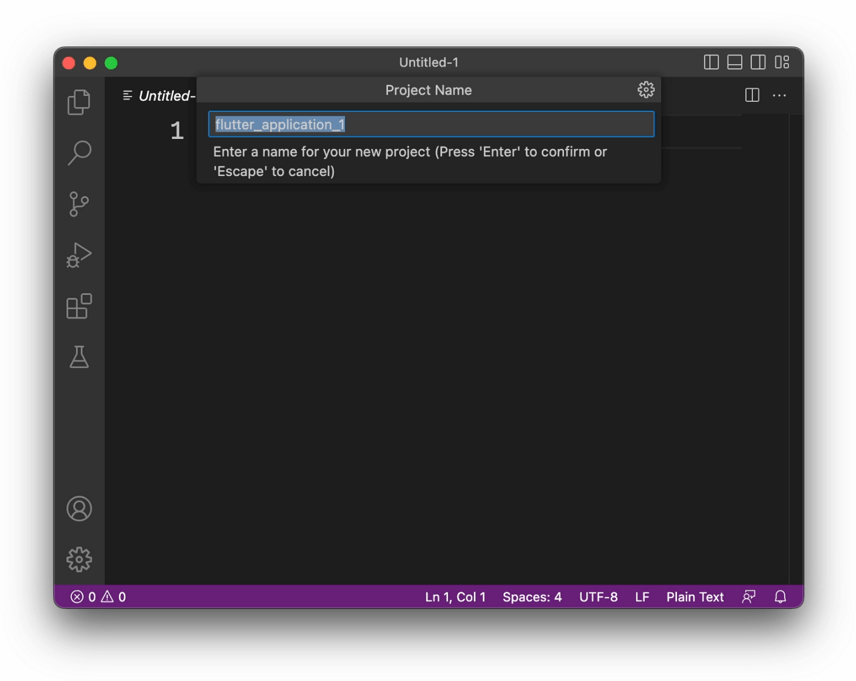
Open VS Code and enter F1 to open the command palette. Now type “flutter new” and select the Flutter: New Project command.
In the next step, select “Application” and then “Create a folder to store your project.” This could be your home directory or something like C:\src\.
Finally, name your project. You can name it anything.
Flutter has finished setting up your project folder, and VS Code has opened it.
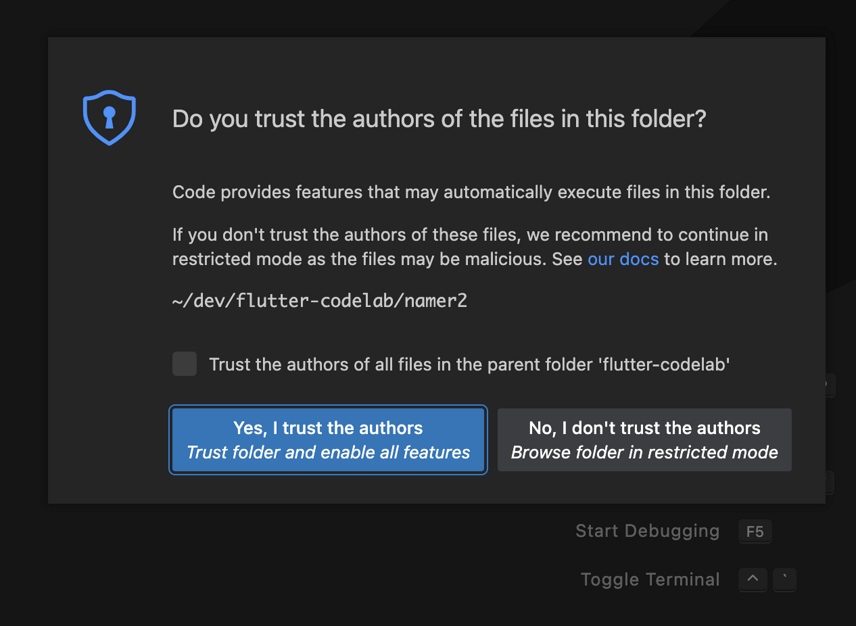
This window is asking for the consent of the developer on whether to trust the contents of the folder or not. If you get the above window after opening VS Code, then select the “Yes” option to continue. The “No” option will disable the significant Flutter functionality.
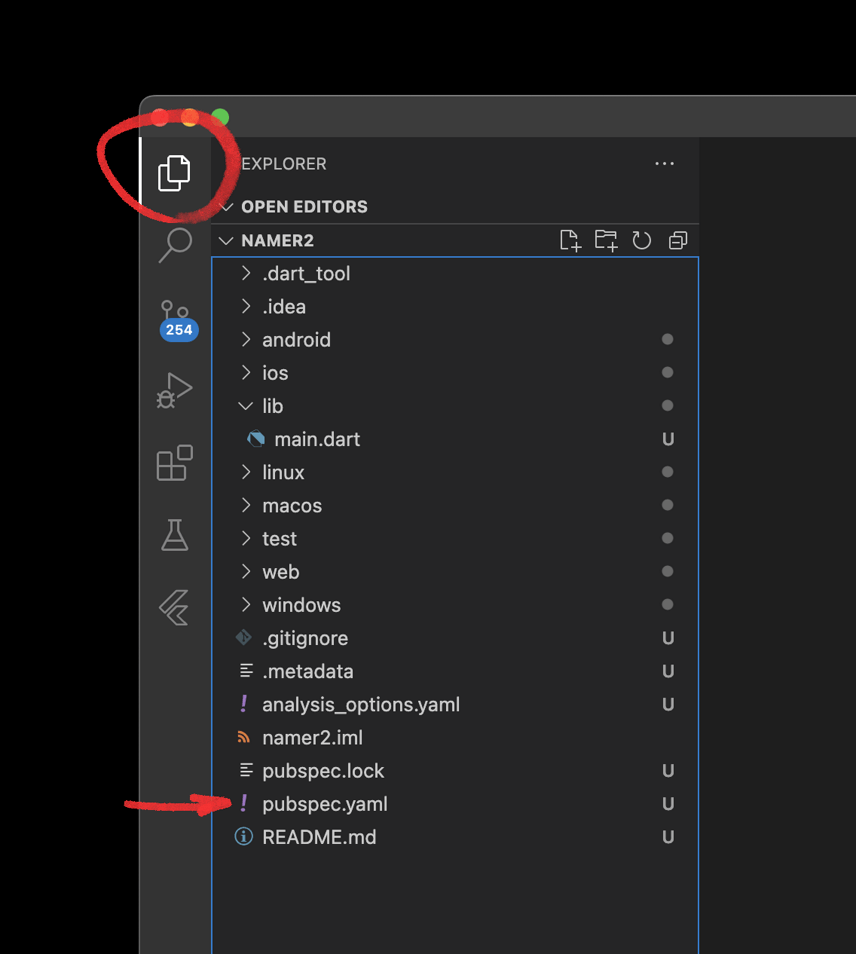
Copy & Paste the initial app
Make sure that Explorer is selected in the left pane of VS Code, and then open the pubspec.yaml file.
Replace the contents of the pubspec.yaml file with the following code:
| name: namer_appdescription: A new Flutter project.
publish_to: ‘none’ # Remove this line if you wish to publish to pub.dev version: 0.0.1+1 environment: sdk: ‘>=2.18.4 <3.0.0’ dependencies: flutter: sdk: flutter english_words: ^4.0.0 provider: ^6.0.0 dev_dependencies: flutter_test: sdk: flutter flutter_lints: ^2.0.0 flutter: uses-material-design: true |
The pubspec.yaml file contains the basic information about the app, including its current version, dependencies, and assets.
Make sure to change the app in the very first line if you have named it something other than namer_app.
Next, open another configuration file, analysis_options.yaml.
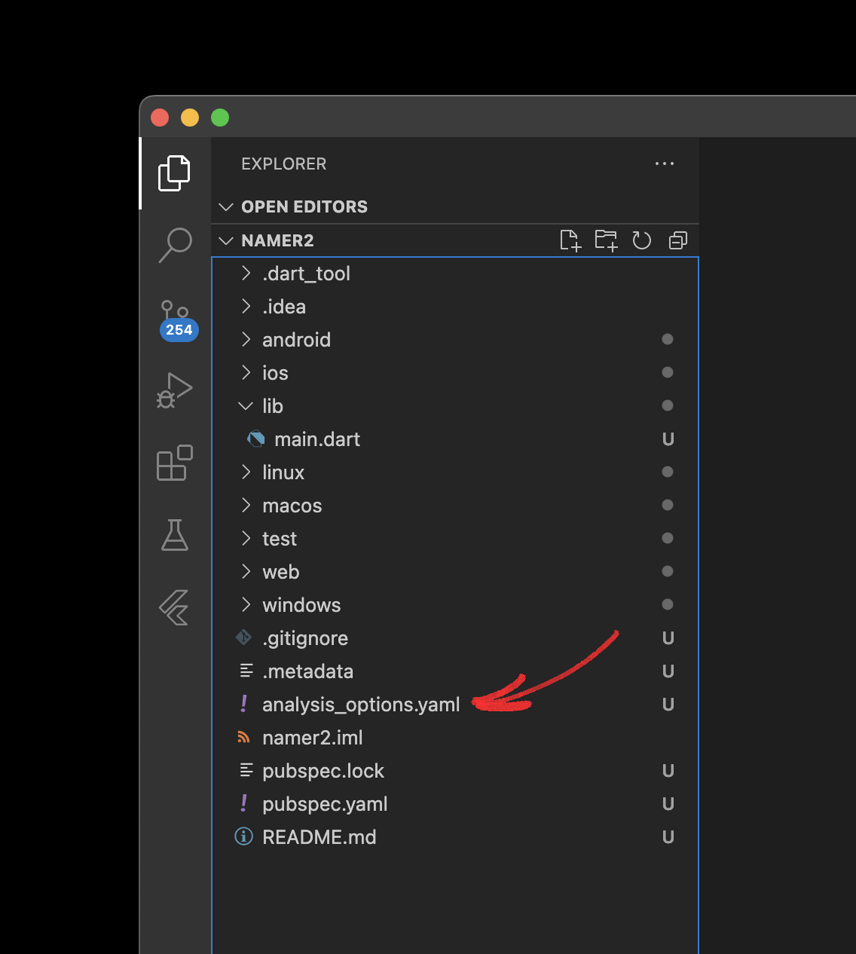
Replace the contents of file analysis_options.yaml with the following code:
| include: package:flutter_lints/flutter.yamllinter:
rules: prefer_const_constructors: false prefer_final_fields: false use_key_in_widget_constructors: false prefer_const_literals_to_create_immutables: false prefer_const_constructors_in_immutables: false avoid_print: false |
The preceding file determines how rigorously Flutter should analyze your code. As this is your initial foray into Flutter, you are telling the analyzer to take it easy. This can always be turned on later. As you get closer to releasing a production-ready app, you will almost certainly want to make the analyzer stricter.
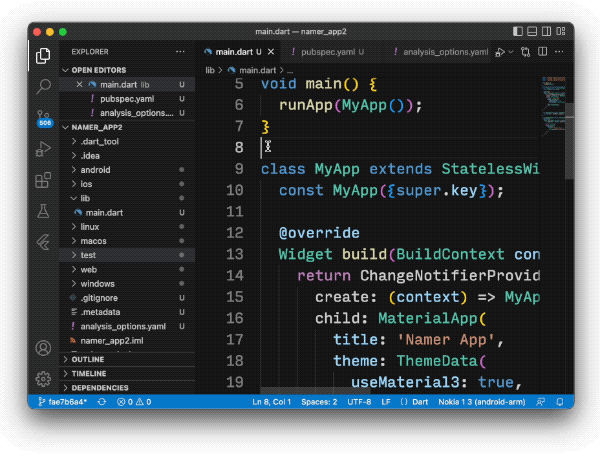
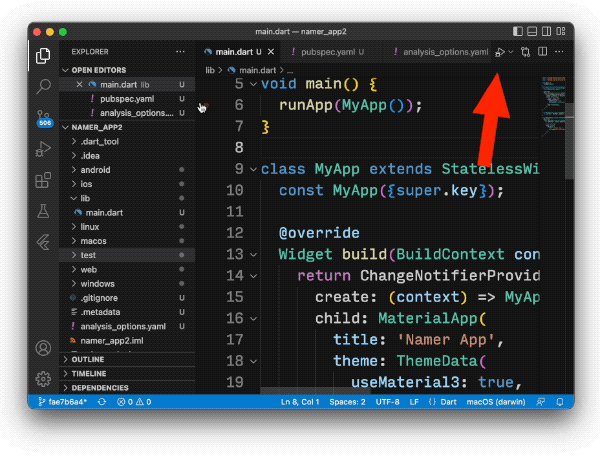
Finally, launch the main.dart file, which can be found within the lib/ directory.
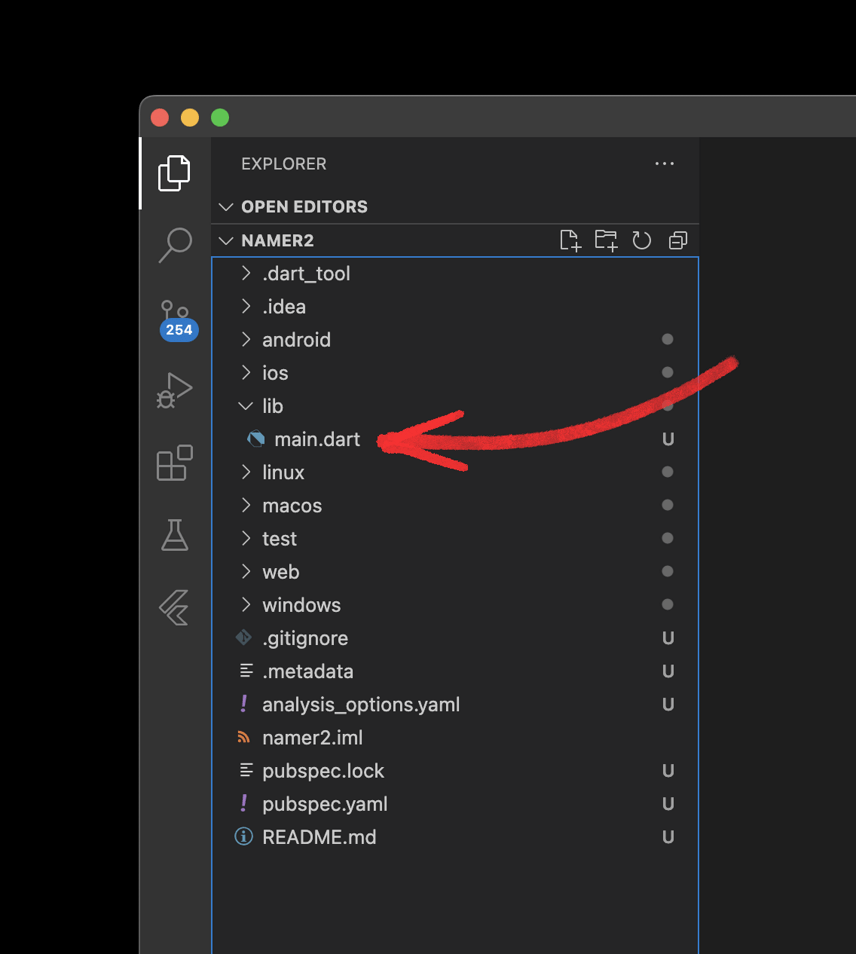
Replace the contents of the lib/main.dart with the below code:
| import ‘package:english_words/english_words.dart’;import ‘package:flutter/material.dart’;
import ‘package:provider/provider.dart’; void main() { runApp(MyApp()); } class MyApp extends StatelessWidget { const MyApp({super.key}); @override Widget build(BuildContext context) { return ChangeNotifierProvider( create: (context) => MyAppState(), child: MaterialApp( title: ‘Namer App’, theme: ThemeData( useMaterial3: true, colorScheme: ColorScheme.fromSeed(seedColor: Colors.deepOrange), ), home: MyHomePage(), ), ); } } class MyAppState extends ChangeNotifier { var current = WordPair.random(); } class MyHomePage extends StatelessWidget { @override Widget build(BuildContext context) { var appState = context.watch<MyAppState>(); return Scaffold( body: Column( children: [ Text(‘A random idea:’), Text(appState.current.asLowerCase), ], ), ); } } |
- Launch the app in debug mode.
Open lib/main.dart and make sure to change the target device.
You’ll find a button at the bottom right corner of VS Code to change the current target device.
Here is the tutorial to change the target device.
Now, find the “play” button in the lib/main.dart file. You will find it in the upper right-hand corner of VS Code’s window.
Your app will launch in a couple of minutes in debug mode, and it will look like the image below 9.
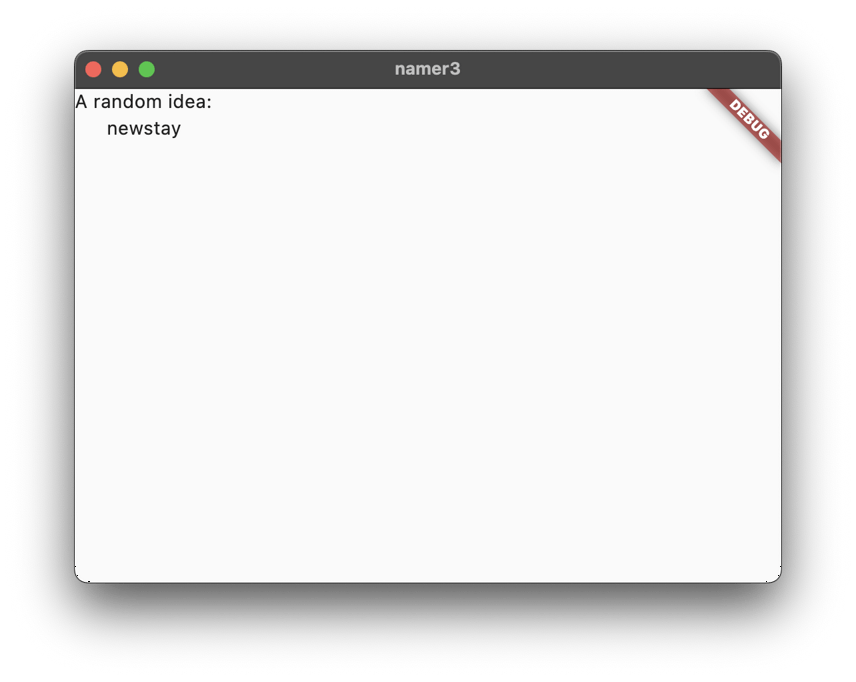
Image 9
First Hot Reload
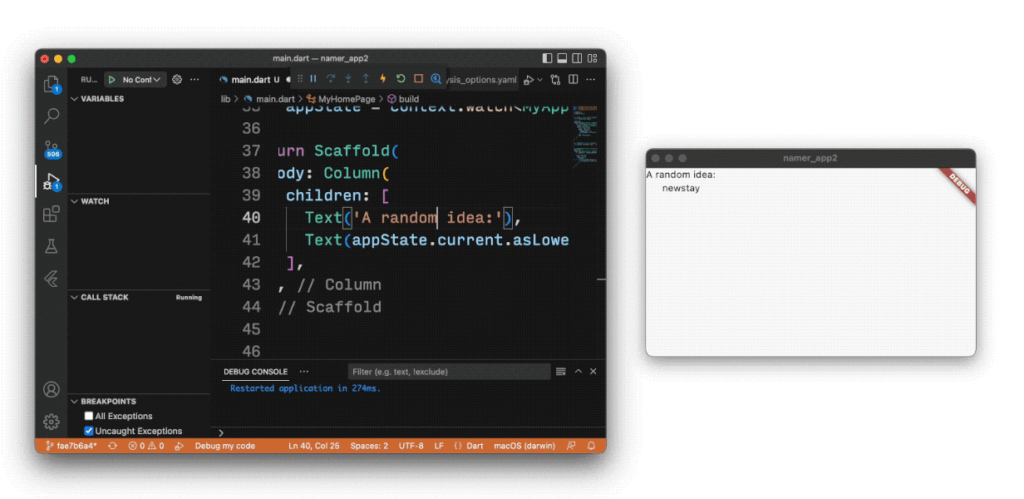
Add text to the string in the first Text object at the bottom of lib/main.dart, then save the file (using Ctrl+S or Cmd+S). For example:
| // … return Scaffold(
body: Column( children: [ Text(‘A random AWESOME idea:’), // ← Example change. Text(appState.current.asLowerCase), ], ), ); // … |
As soon as you change the codes, your app changes immediately and looks as shown below.
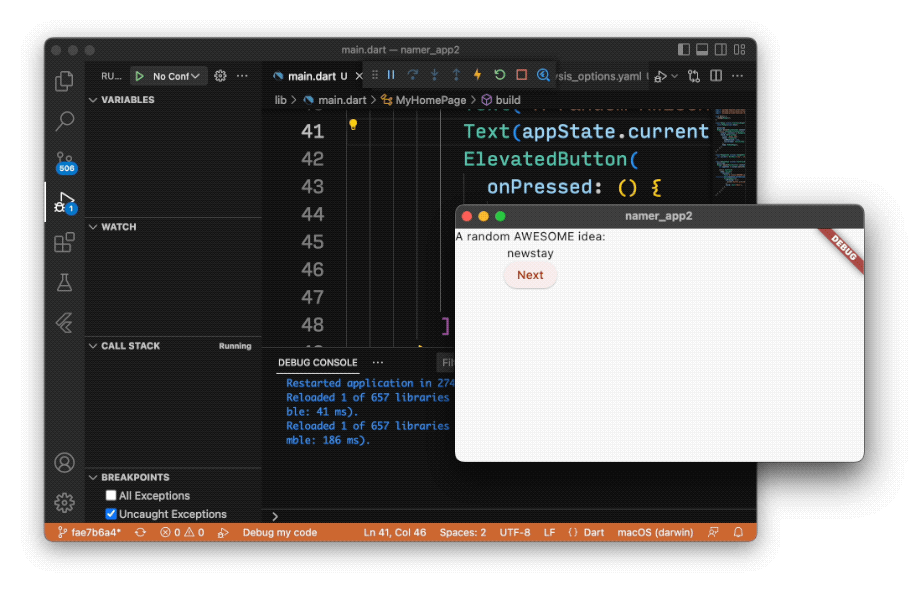
- Adding a button
In the next stage, we will add a button at the bottom of the column.
| // … return Scaffold(
body: Column( children: [ Text(‘A random AWESOME idea:’), Text(appState.current.asLowerCase), // ↓ Add this. ElevatedButton( onPressed: () { print(‘button pressed!’); }, child: Text(‘Next’), ), ], ), ); // … |
Save the change, and your app will start looking as shown below.
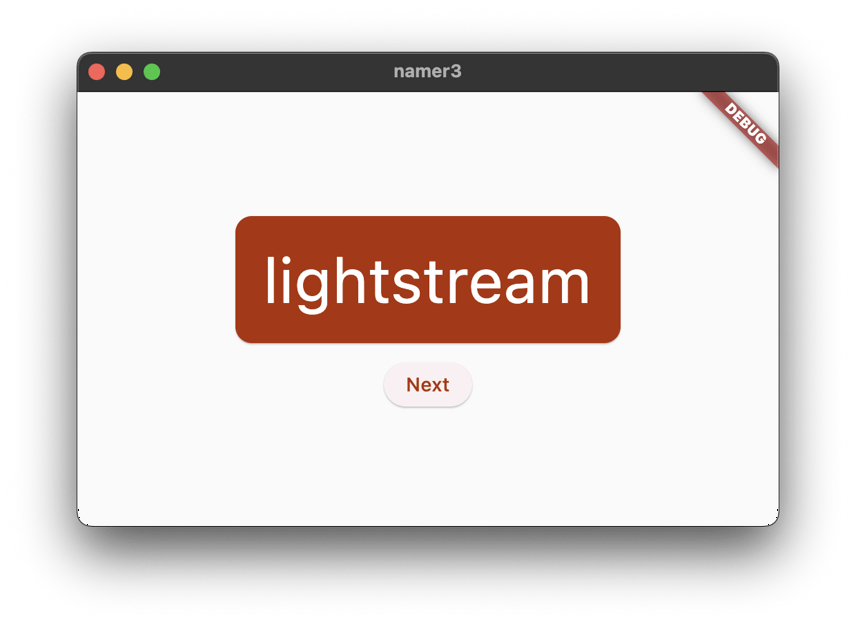
We have to make a few more changes in the application, after which the final screen of the application will look like the one below.
- Add functionality
The app will show random words, which will disappear as you click the next button. If you want to keep any word in the memory of the app, then you have to add a function to it.
A “remember” function, like a “like” button, will be a good deal.
Adding business logic
To add this function, you have to scroll to MyAppState and add the code below:
| // …class MyAppState extends ChangeNotifier {
var current = WordPair.random(); void getNext() { current = WordPair.random(); notifyListeners(); } // ↓ Add the code below. var favorites = <WordPair>[]; void toggleFavorite() { if (favorites.contains(current)) { favorites.remove(current); } else { favorites.add(current); } notifyListeners(); } } // … |
A new property named “favorites” has been created, and this is where you should store your preferred word.
Adding a Like button
The “business logic” has been completed, and now we can return to developing the interface. A Row is needed to position the ‘like’ button next to the ‘next’ button. The Row widget is the horizontal counterpart to the Column widget, which was previously seen.
Begin by wrapping the current button in a Row. Go to the build() method of MyHomePage, place the cursor on the ElevatedButton, and invoke the Refactor menu with Ctrl+. or Cmd+., and select Wrap with Row.
Upon saving, you will observe that Row behaves similarly to Column in that, by default, it aligns its children to the left. To resolve this, you could employ the same strategy as before, but with mainAxisAlignment. However, mainAxisSize should be used for educational purposes. This instructs Row to not take up all of the horizontal space that is currently available.
Change the code as shown below:
| // …class MyHomePage extends StatelessWidget {
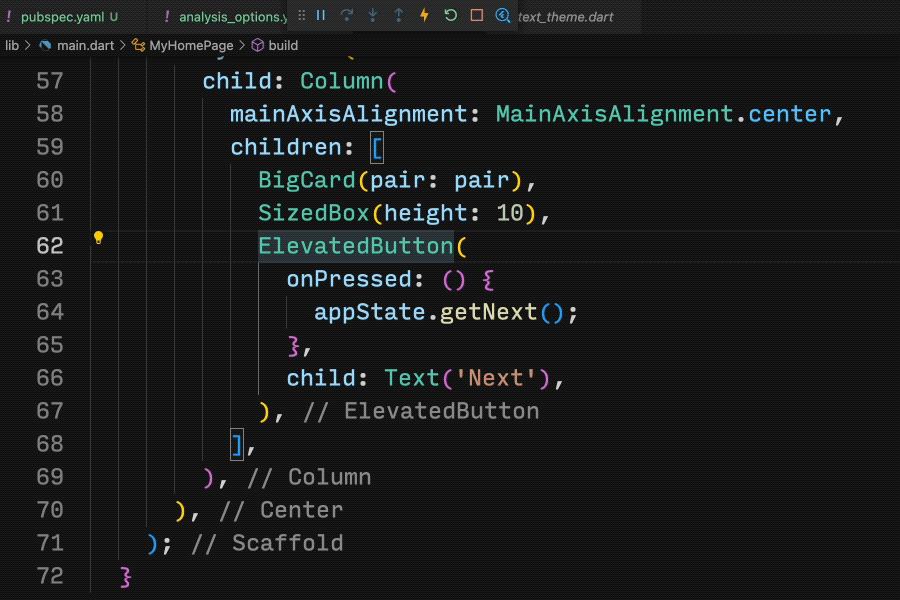
@override Widget build(BuildContext context) { var appState = context.watch<MyAppState>(); var pair = appState.current; return Scaffold( body: Center( child: Column( mainAxisAlignment: MainAxisAlignment.center, children: [ BigCard(pair: pair), SizedBox(height: 10), Row( mainAxisSize: MainAxisSize.min, // ← Add this. children: [ ElevatedButton( onPressed: () { appState.getNext(); }, child: Text(‘Next’), ), ], ), ], ), ), ); } } // … |
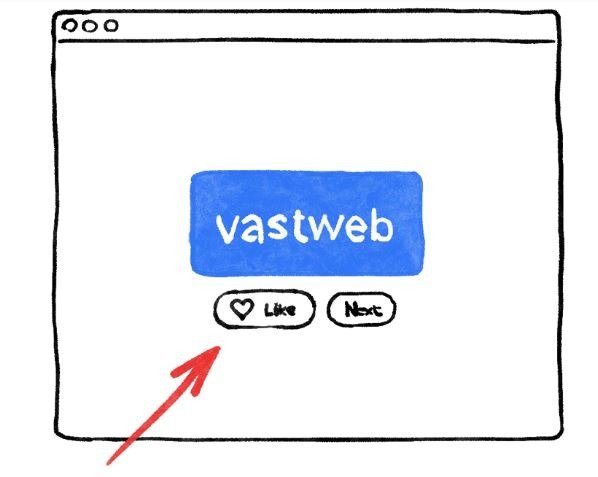
Adding a second button to MyHomePage can be done in a few different ways. This time, when you want to create a button with an icon, you should use the ElevatedButton.icon() constructor. And at the very top of the build method, select the appropriate icon depending on whether or not the current word pair is already in the favorites list. Also note the repeated use of SizedBox to keep the two buttons somewhat apart.
| // …class MyHomePage extends StatelessWidget {
@override Widget build(BuildContext context) { var appState = context.watch<MyAppState>(); var pair = appState.current; // ↓ Add this. IconData icon; if (appState.favorites.contains(pair)) { icon = Icons.favorite; } else { icon = Icons.favorite_border; } return Scaffold( body: Center( child: Column( mainAxisAlignment: MainAxisAlignment.center, children: [ BigCard(pair: pair), SizedBox(height: 10), Row( mainAxisSize: MainAxisSize.min, children: [ // ↓ And this. ElevatedButton.icon( onPressed: () { appState.toggleFavorite(); }, icon: Icon(icon), label: Text(‘Like’), ), SizedBox(width: 10), ElevatedButton( onPressed: () { appState.getNext(); }, child: Text(‘Next’), ), ], ), ], ), ), ); } } // … |
After a long coding session, your app will look like this:

Unfortunately, the user is unable to view their favorites. It’s time to add an entirely new screen to our application.
- Adding navigation rail
It’s impossible for an app to hold every feature on a single screen. So, we will create a separate screen to show the favorites selected by the user. You will use your first StatefulWidget to switch between the two screens.
Replace the entire code of the MyHomePage with the code below:
| // …class MyHomePage extends StatelessWidget {
@override Widget build(BuildContext context) { return Scaffold( body: Row( children: [ SafeArea( child: NavigationRail( extended: false, destinations: [ NavigationRailDestination( icon: Icon(Icons.home), label: Text(‘Home’), ), NavigationRailDestination( icon: Icon(Icons.favorite), label: Text(‘Favorites’), ), ], selectedIndex: 0, onDestinationSelected: (value) { print(‘selected: $value’); }, ), ), Expanded( child: Container( color: Theme.of(context).colorScheme.primaryContainer, child: GeneratorPage(), ), ), ], ), ); } } class GeneratorPage extends StatelessWidget { @override Widget build(BuildContext context) { var appState = context.watch<MyAppState>(); var pair = appState.current; IconData icon; if (appState.favorites.contains(pair)) { icon = Icons.favorite; } else { icon = Icons.favorite_border; } return Center( child: Column( mainAxisAlignment: MainAxisAlignment.center, children: [ BigCard(pair: pair), SizedBox(height: 10), Row( mainAxisSize: MainAxisSize.min, children: [ ElevatedButton.icon( onPressed: () { appState.toggleFavorite(); }, icon: Icon(icon), label: Text(‘Like’), ), SizedBox(width: 10), ElevatedButton( onPressed: () { appState.getNext(); }, child: Text(‘Next’), ), ], ), ], ), ); } } // … |
After saving, you’ll notice that the UI’s visual component is prepared, but it is inoperable. Nothing happens when you click the heart icon in the navigation rail.

We have to make a few changes in the coding to make the icon work.
Firstly, we will introduce a new variable, selectedIndex, and initialize it to 0.
You substitute this new variable for the previously hard-coded 0 in the NavigationRail definition.
When the onDestinationSelected callback is invoked, rather than simply printing the new value to the console, you assign it to the selectedIndex variable using the setState() method. This call is similar to the notifyListeners() method used previously—it makes sure that the UI updates.
That is how your code will look after the changes.
| // …class _MyHomePageState extends State<MyHomePage> {
var selectedIndex = 0; // ← Add this property. @override Widget build(BuildContext context) { return Scaffold( body: Row( children: [ SafeArea( child: NavigationRail( extended: false, destinations: [ NavigationRailDestination( icon: Icon(Icons.home), label: Text(‘Home’), ), NavigationRailDestination( icon: Icon(Icons.favorite), label: Text(‘Favorites’), ), ], selectedIndex: selectedIndex, // ← Change to this. onDestinationSelected: (value) { // ↓ Replace print with this. setState(() { selectedIndex = value; }); }, ), ), Expanded( child: Container( color: Theme.of(context).colorScheme.primaryContainer, child: GeneratorPage(), ), ), ], ), ); } } // … |
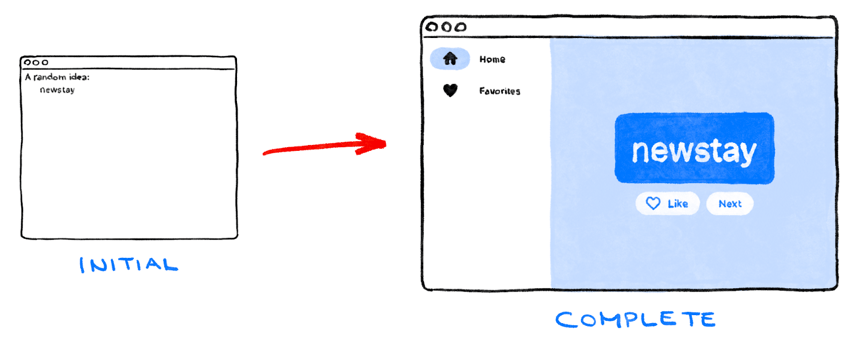
Congratulations, we have created a basic Flutter application that is responsive to all operating systems.
Final thoughts:
Starting a Flutter application is a great way to learn a new language and create a powerful, modern application. If you are looking for a Flutter Tutorial for Beginners, this guide will help you understand the basics step by step. While it may seem intimidating at first, Flutter is actually very easy to learn. With a few tutorials and a bit of practice, anyone can learn the basics of Flutter and start creating their own applications. Also, you can follow the aforementioned steps to create your first Flutter app and can take help from the Flutter community and the many resources available online to make it better. After all, starting a Flutter application is a great way to start your programming journey.


About Author
Nicole
I am the admin at 10TechDesign. I am also a technical blogger and digital marketing expert. I handle all internet marketing-related activities at 10techDesign along with his team.